
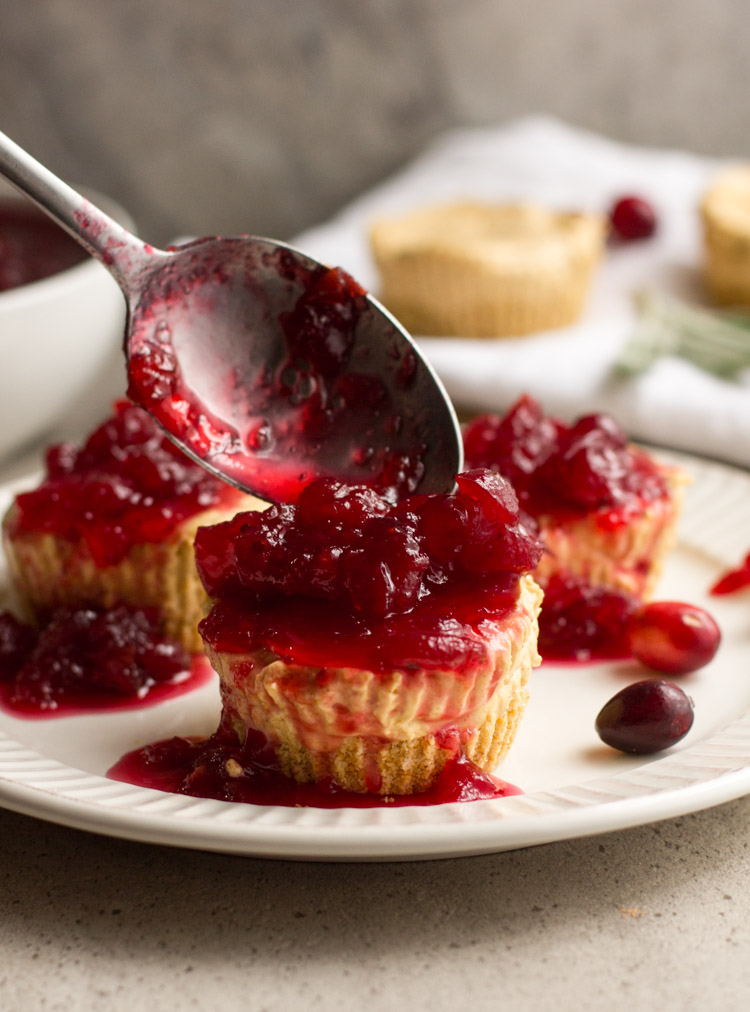
Chocolate Covered Strawberry Mini Cheesecakes
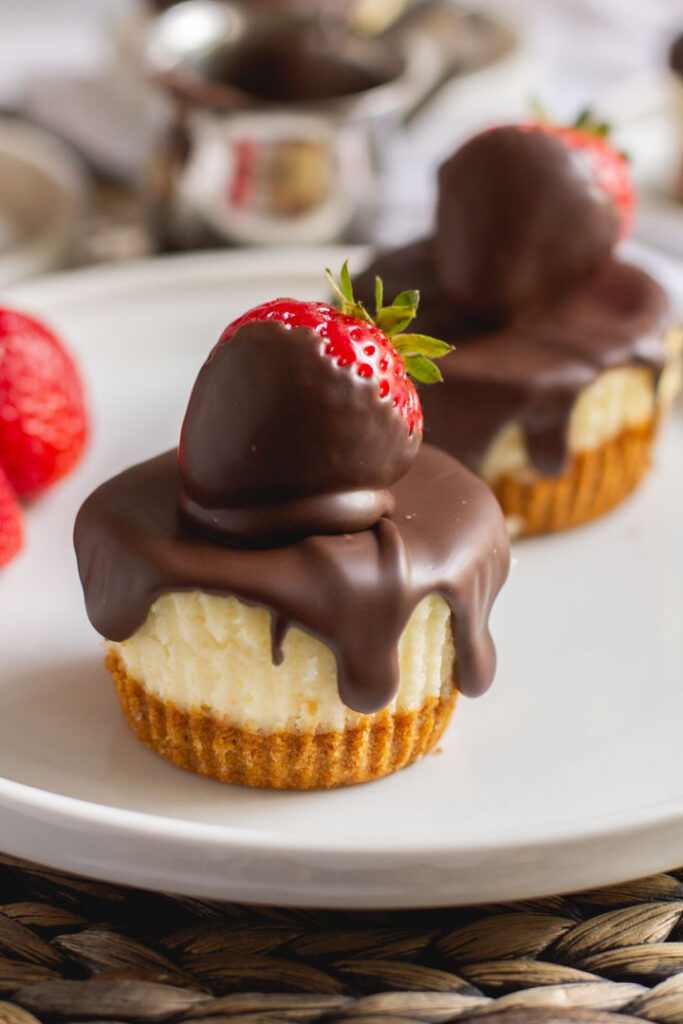
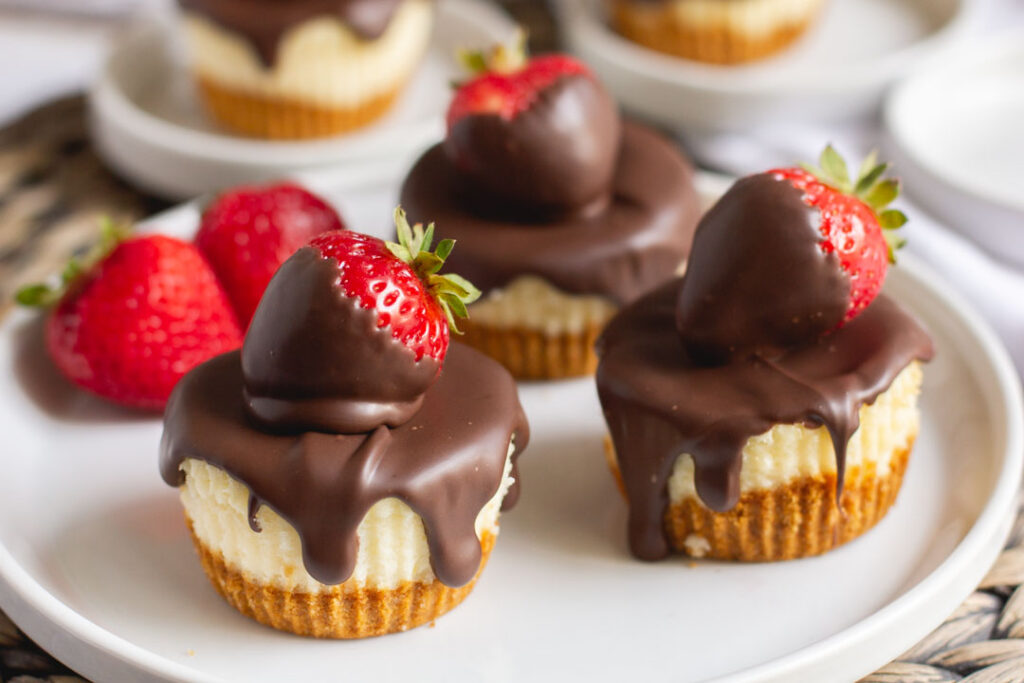
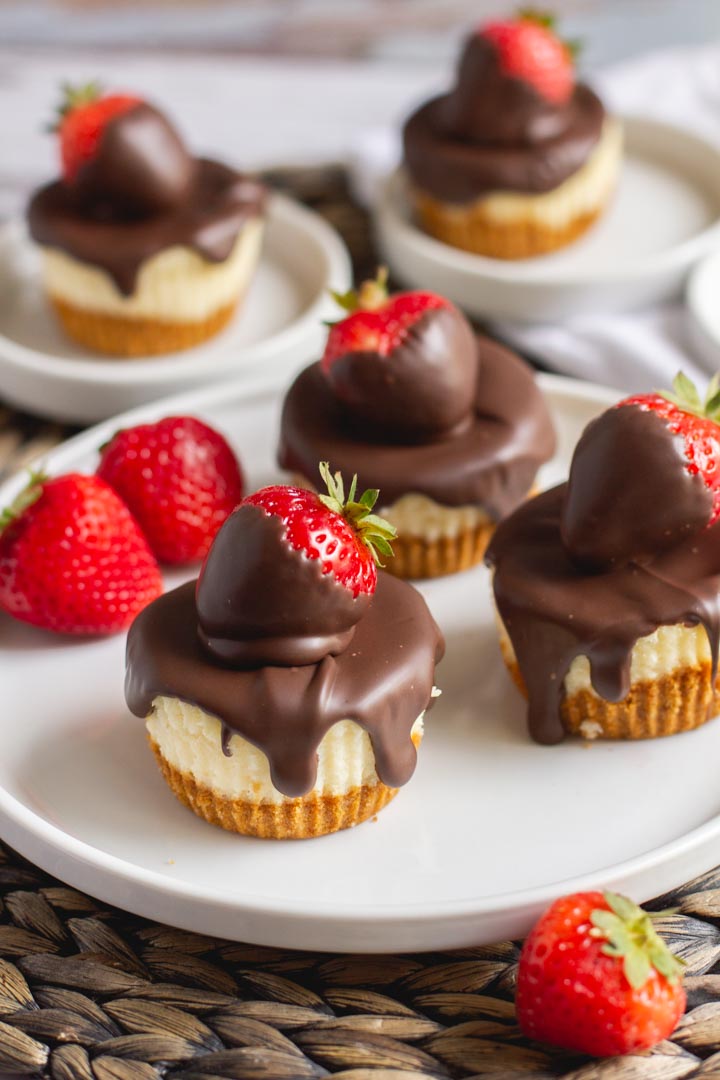
The best way to serve these classic mini cheesecakes is with chocolate covered strawberries on top! Check out this recipe for light and airy mini cheesecakes with a graham cracker crust – they’re a delightful twist on the typical dense and creamy cheesecake!
Posts on this website contain affiliate links. Purchases made through these links provide a small commission. As an Amazon Associate, I earn from qualifying purchases.

What makes this recipe unique
There are so many cheesecake recipes out there. Some are made with buttermilk, some with sour cream, some are no bake, some use a water bath, and some are even made in the Instant Pot. So what makes this recipe different?
The texture! These mini cheesecakes feel light and firm, but still delicate and fluffy. They’re perfect for a person, like me, who doesn’t typically enjoy the super dense, super creamy, fills-your-whole-mouth-with-custard kind of cheesecake.
The secret ingredient to this perfect texture? Whipped egg whites! I first learned this method back in the late 2000s when low-fat was still the biggest diet craze. It was in a Devin Alexander cookbook, and it shattered my world. This was the texture I’ve always been looking to recreate in a cheesecake!
Since then I have learned it is similar to the method used in Japanese cheesecakes (which are awesome, by the way).
Taste
These cheesecakes are more sweet than tangy, as they don’t contain buttermilk or sour cream. I find that the sweet vanilla cream cheese flavor of these cheesecakes compliment the chocolate covered strawberries to make a dessert that not only looks gorgeous, but tastes wonderful and is easy to please even the pickiest of palates.
Troubleshooting and what to expect
So many people have made this recipe and offered feedback now (and if you’re one of those reading this, thank you – it is invaluable). The biggest pitfall in this recipe is cave in. Due to the nature of whipped egg whites and cooking at a higher and sometimes unregulated temperature (calibrate your oven or get a cheap thermometer for accuracy), these cheesecakes are more prone to have cracks and fallen centers.
I reworked this recipe a little when I made these mini pumpkin cheesecakes in late 2019. The easiest way around this is to whip the egg whites just a little less- not to the point of stiff peaks like earlier versions of this recipe said. Whipping until the egg whites are nice and frothy, but don’t produce peaks strikes the perfect balance in texture and helps prevent those fallen centers.
However, cracks and slightly fallen centers are still expected. This gives them the perfect little well to hold your toppings, and with the top of the cheesecakes covered no one will notice imperfections.
Using dipping chocolate vs ganache
Dipping chocolate is what is typically used on a chocolate covered strawberry – it’s what gives them that crunchy chocolate shell and is what I used in the pictures. It’s delicious and awesome and hardens quickly to give that pretty drippy look, but it does make eating these a little messy and considerably less graceful.
If that is not your jam, I added the option for a ganache. It is a softer, yet still firm version of a chocolate topping, just mixed with a little cream to give it the texture of a truffle. This makes them much easier to eat with no hard outer shell to get through to that soft center.
In all, I think you’re really going to love this recipe. I make it for all kinds of occasions, from Christmas to Valentine’s Day, Mother’s Day, birthdays, bridal showers, and everything in between!
And if you like this recipe, you might also enjoy my other cheesecake recipes:
Until Next Time. X
Chocolate Covered Strawberry Mini Cheesecakes
Chocolate Covered Strawberry Mini Cheesecakes
The best way to serve these classic mini cheesecakes is with chocolate covered strawberries on top! Check out this recipe for light and airy mini cheesecakes with a graham cracker crust – they’re a delightful twist on the typical dense and creamy cheesecake!
- Total Time: 3 hours, 15 minutes
- Yield: 12-15 mini cheesecakes 1x
Ingredients
For the crust:
- 1 c. graham cracker crumbs
- 4 TB unsalted butter, melted
- 1/4 c. granulated sugar
- pinch of salt
For the filling:
- 16 oz. cream cheese, room temperature
- 2 eggs, whites and yolks separated at room temperature
- 3/4 c. granulated sugar
- 1/2 tsp salt
- 1 tsp vanilla extract
- dash of granulated sugar
Hard shell topping (pictured)
- 10 oz. chocolate melting wafers
- 12 – 15 strawberries
Ganache Topping (optional)
- 4 oz. chocolate, shaved or chopped finely
- 1/2 c. heavy cream
- 1/2 tsp. vanilla
Tools
hand mixer or stand mixer
Instructions
- Preheat the oven to 375°F.
- In a small bowl, combine the graham cracker crumbs, sugar, salt and melted butter. Place cupcake liners in a 12 cup muffin tin and begin dropping rounded Tablespoons of the graham cracker mixture into each liner. Press the crumbs into the bottom of the liner lightly, creating a crust. There may be some crumbs left over.
- Pre-bake for 8 minutes, then remove from the oven and reduce temperature to 350°F.
- In a large bowl or the bowl of a stand mixer, beat together the cream cheese, granulated sugar, salt and vanilla extract until fully combined and creamy. Beat in the egg yolks one at a time.
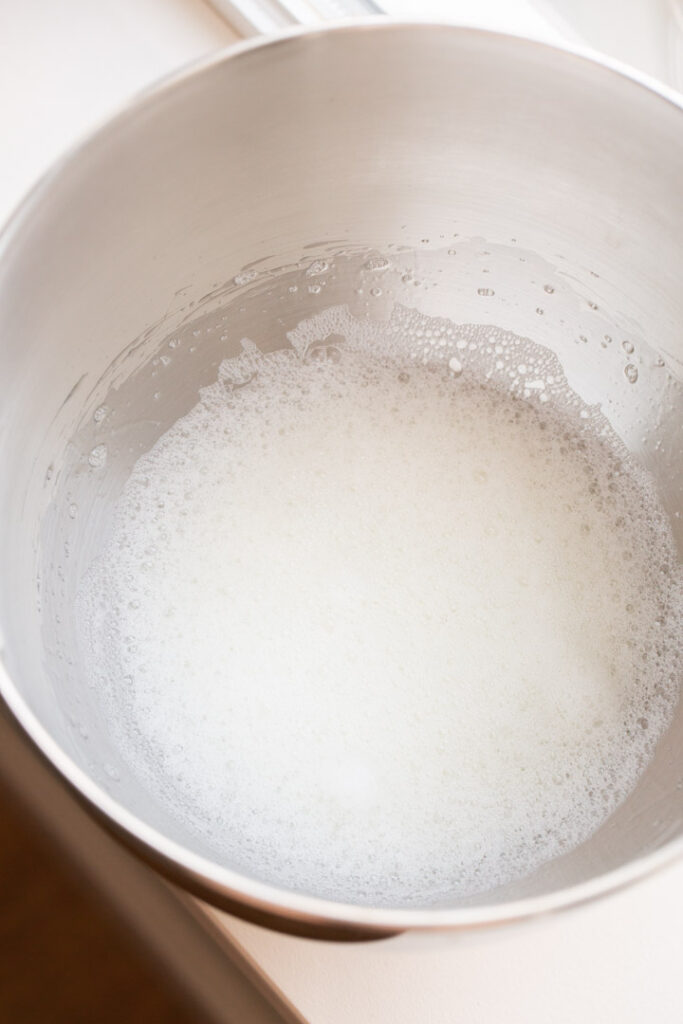
- In a small bowl using a whisk or hand mixer, beat the egg whites until frothy and doubled in size.
- Gently fold the eggs whites into the cream cheese, mixing to a smooth yet thin consistency, then divide among the 12 muffin liners until the cups are almost full. You may have a little bit of leftover mixture, which you can use with the extra graham cracker crumbs to make a bakers dozen or discard.
- Bake for 20 minutes. Let rest at room temperature for 20 minutes until the filling returns to its normal shape. Don’t worry about cracks in the surface, as you’ll be covering them with chocolate.
- Chill for a minimum of 2 hours before topping.
Hard Shell Topping
- Using a double boiler, gently melt your chocolate, stirring occasionally to combine. (Alternatively, microwave in 30 second intervals, stirring each time)
- At this point, you can keep the cheesecakes in their liners or choose to remove them to get results like the picture above.
- With a regular kitchen spoon, pour chocolate on top of the cheesecakes making sure to coat the entire surface. (Gently press melted chocolate over the edges to get the dripping effect above) Wait until the chocolate on the cheesecakes harden before dipping the strawberries in the bowl of melted chocolate and resting on top of each cheesecake. Keep chilled until ready to serve.
Ganache Topping
- Heat the heavy cream and vanilla in a saucepan until it starts to steam. Add the chocolate shavings and let sit for a minute to melt. Stir gently until just combined. Over-mixing may cause the chocolate to seize.
- Pour spoonfuls of the ganache on top of each cheesecake and gently press over the edges to get the dripping effect. Dip each strawberry in the ganache and gently twirl off any excess, then place one on top of each mini cheesecake. Keep chilled until ready to serve.
Notes
Make sure all of your ingredients, bowls and utensils are room temperature.
The strawberries I used are smaller, juicier ones around 1 – 1 1/2″ in length.
Recipe updated Jan 2020 for better consistency, optional ganache topping, and fewer cave-ins.
- Prep Time: 20 minutes
- Cook Time: 28 minutes
- Category: Dessert
- Method: Oven
- Cuisine: American


These are lovely. I think that the chocolate covered strawberry on top makes them look sensational. And thanks for your cheesecake baking tips.
Hi!!!
I want to make this recipe for my friends birthday but was thinking of doing it in a mini cupcake pan.. would that be possible??
Hi! So I’ve never made them in a mini cupcake pan before, but if I were to attempt them I’d start checking on them after 10 minutes of baking and leave them in no longer than 15 minutes. That’s what I do for regular mini cupcakes, however like I said I’ve never tested the cheesecakes this way. I think they will still turn out. Should yield 36-40 minis. If you try it I’d love to know how it goes! You’ll probably want to halve or quarter the strawberries too, so that they aren’t too big. 😊
Hi. After baking the cheesecake for 20 Minutes when I took it I poked a toothpick in it and it was still liquid inside. Why? I followed the instructions properly
Hi Anya! After they come out of the oven and rest on the counter, they will continue to cook. Was it the same consistency as before you put it in the oven? Or was it that some of the batter still stuck to the toothpick when pulling it out? The cheesecake will stick no matter what, so that is normal. But if it still the same consistency as before baking, I would consider baking for an extra few minutes or verifying the temperature on your oven. My oven’s temperature is often a little off so I bought an oven thermometer to make sure it’s accurate every time. I hope this helps!
Awesome recipe!
Hello I’m interested in making this recipe but do you have the exact measurements for the pinch of salt and the dash of sugar?
Hi Gaby!
A pinch is generally considered 1/16 of a teaspoon and a dash is 1/8 of a teaspoon. Using these terms I just mean it’s okay to kind of eyeball it. It’s literally just what I can pinch between my fingers. So if it’s a little over or a little under those amounts, don’t worry. It shouldn’t be enough to have a big impact on the dish. I hope you like it!
Thank you so much for posting this awesome recipe! I have made cheesecake only twice before , and I am not much of a fan of cheesecake, because of the dense texture, but these are absolutely phenomenal! Loved,loved loved them! Even hubby ,who never eats cheese cake, had a try and was surprised how good they are! Going to make them for a friend’s birthday,who loves cheese cake !
Thank you so much for the kind words! I’m so glad you enjoyed it! I’m the same – I don’t much enjoy the dense cheesecakes either.
I’m going to try these next weekend. Wish me luck lol I have a question. The recipe is for 12. But if I want to make 24 do I just double the recipe ?
Yes, just double the recipe – easy peasy. I’m sure you’ll do great! 😀
Thank you